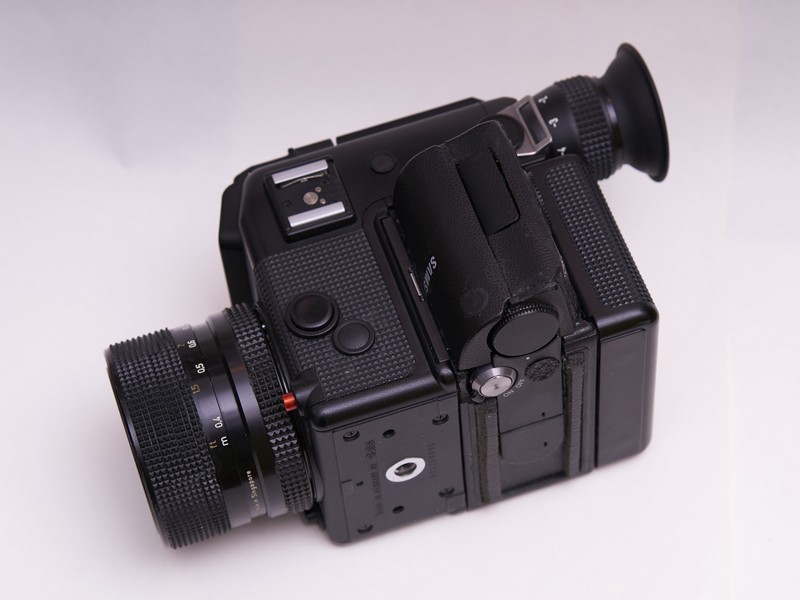
Rolleiflex SL 2000 with digital
back „SWVS“
(2017)
This
took
me a loooong while…
Interchangeable
backs are quite common on medium format cameras, to speed up the film
change.
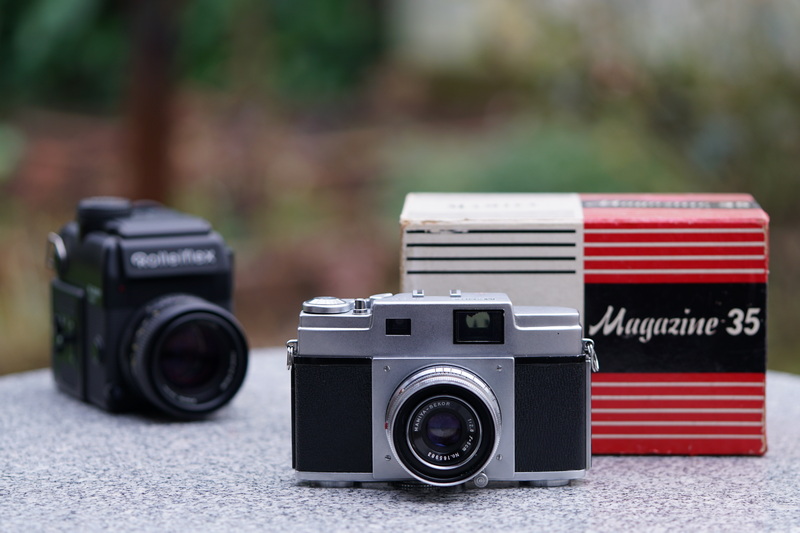
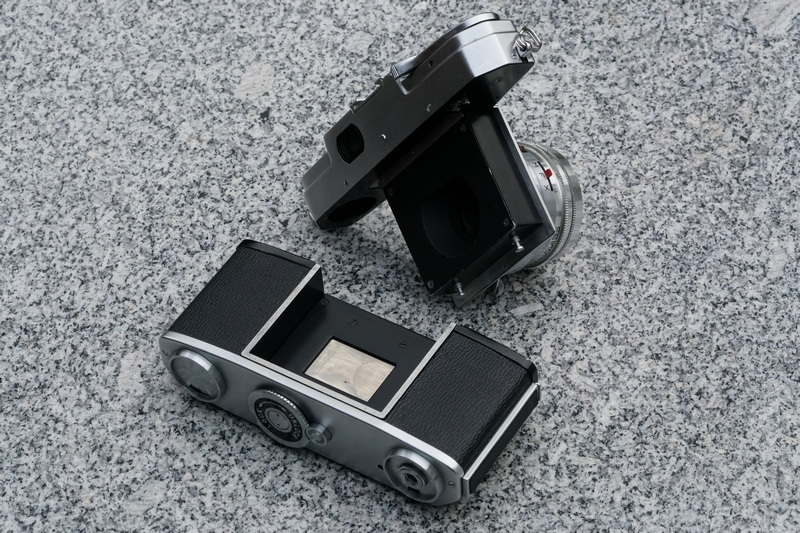
On 35mm cameras however, such backs are extremely rare. Apart from the
Rolleiflex SL 2000 F and its successor models 3001 and 3003, there are
only two
or three others, one of them this one here, the Mamiya Magazine 35 from
the
fifties.
Apparently,
the striking idea to be able to use several kinds of film
simultaneously in one
camera did not appeal to so many photographers after all. Or it
proved to be
too expensive, like in the case of the Rolleiflex.
I
always
had an ambivalent relationship with this camera. As convincing as the
feature
list reads, the camera is a most unwieldy brick.
Nevertheless, it
is a milestone and one that points towards the digital age, even if
Rollei couldn’t
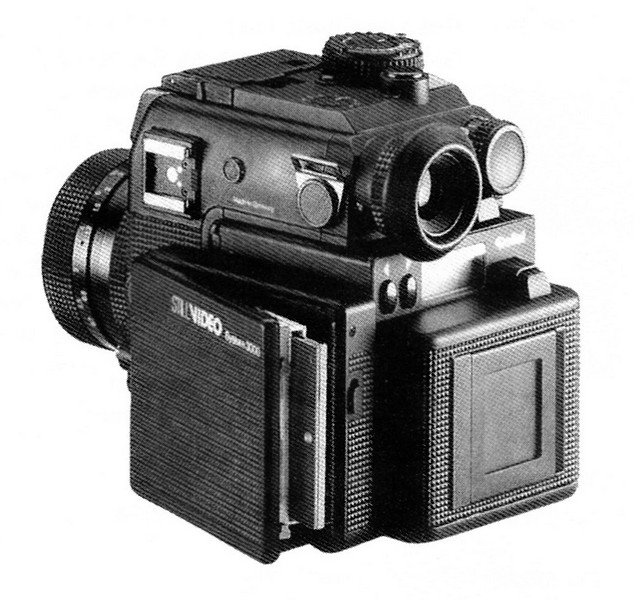
foresee that at the time. When they realized, the showed us a digital
back in
1987, alas with only a tiny ½” sensor, with
laughable 0.3 Megapixels and with a
floppy disk drive for storage.
Still,
5
points to Gryffindor for trying…
Oh,
if
everything had turned out differently…
If
Rollei had
not become insolvent, or if its new owners had set different
priorities, we
might have seen an autofocus version of the 3003 with lenses from Carl
Zeiss
(and Zeiss might even have refrained from sailing away with Yashica, to
new autofocus
shores).
And
eventually, we would have been given a digital back to fit the
“3008 AF”,
because this Rolleiflex is the single camera where such a back makes
sense.
Even
today,
this would be an intriguing camera system, featuring the (relatively
low cost)
option to upgrade ones ageing camera kit to newer digital sensor
technology.
Sports shooters would own the newest body with lightning fast
autofocus,
landscape photographers would own the highest resolution sensor but
maybe an
old SL 2000 body – and people like me, who love to shoot an
occasional slide
film would just do this, with their never ageing Rolleiflex.
Daydreams!
But
then,
being able to raise a hand and say, “Well, I’ve got
one…” would still be nice,
so I could not get the idea of such a digital back out of my head.
Even
more
so after Sony gave the photo world the NEX cameras, incorporating a
relatively
big APS-C sensor in a very small and rather cheap body. Should I tinker
with
that? Could I fit the digital innards of a NEX camera into the housing
of a SL
2000 film magazine, thereby retaining the camera’s ability to
also work with
film?
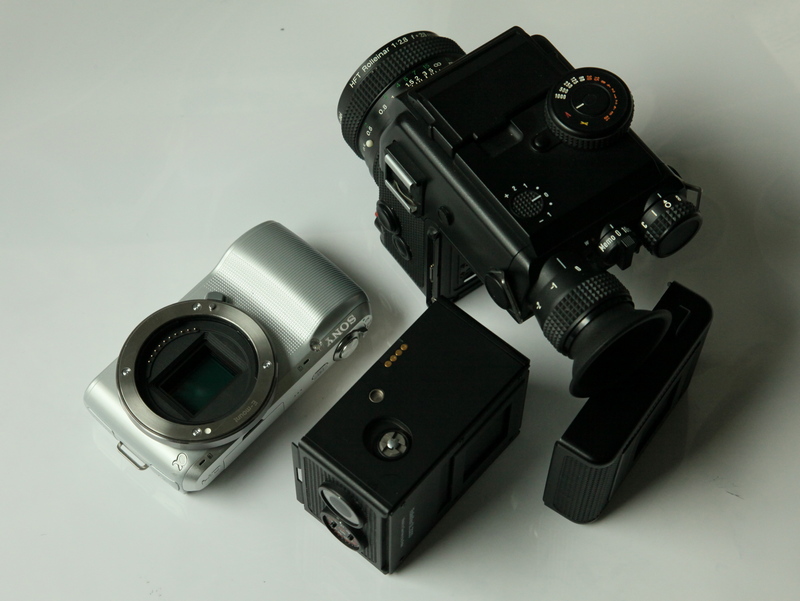
Even
from
looking at the NEX camera it became clear that this was no mean feat,
because
the shutter sitting in front of the NEX sensor would have to go and
make room, in
order to move the sensor into the focal plane (where the space in front
of it
is occupied by the SL2000’s own shutter). That way, the
digital sensor would
capture the image - focusing and exposure would remain the task of the
Rollei.

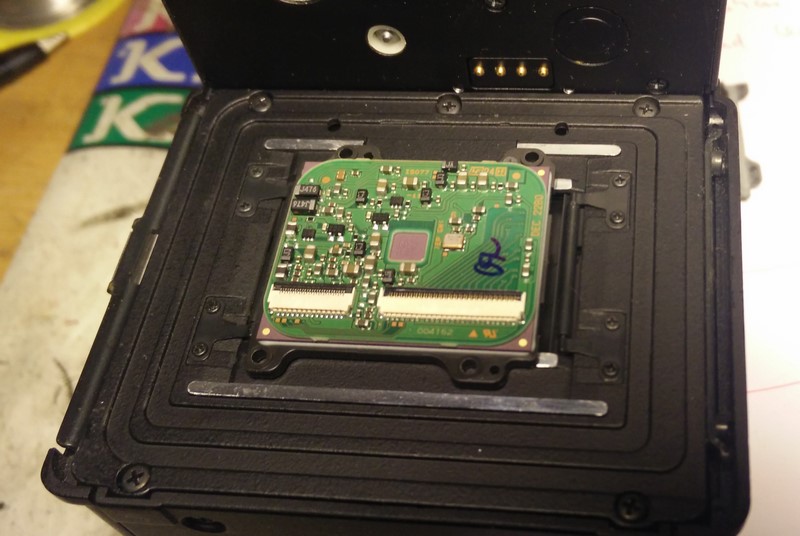
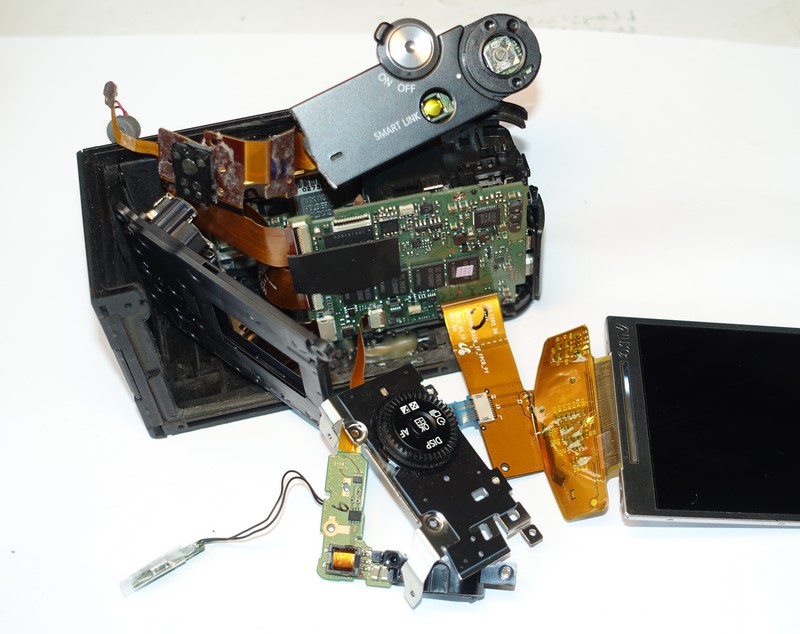
The
first
Sony NEX camera (a NEX 3 with 14 Megapixels) became my victim in 2014
and I enjoyed
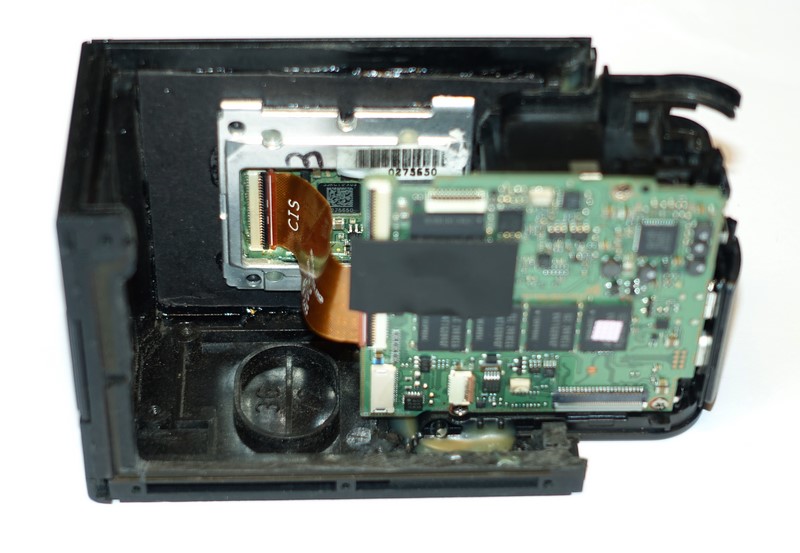
taking it apart. It is remarkable how few components the camera
contains, how
„integrated“ it is.
Bringing
the sensor far enough forward to reach the focal plane proved to be the
most
difficult task of the whole undertaking – unfortunately an
essential
requirement for sharp pictures…
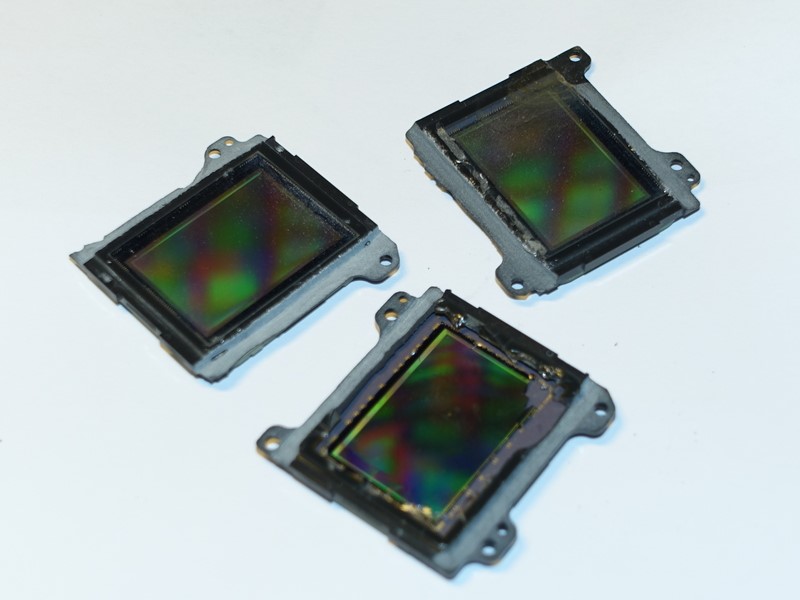
To
be able
to position the sensor, its frame needed to be machined down, from a
little
over 24mm to a little less – and the material is very hard,
some kind of
ceramic.
This
also
means that a “full frame” version of this back
(using a 24x36mm sensor from
e.g. a Sony A7) is out of bounds. Any
sensor of this size would have at least a very narrow frame around and
a
protective glass in front of it, making it impossible to move the
sensor far
enough to the front.
There
is
not much room anyway, even though the actual sensor area is only half
of 24x36.
The flexible wirings are rather short, so there is not much space to
rearrange
the components.
I
did a lot
of filing and then I damaged the sensor and I threw it all into a box
and out
of sight.
Then
I
tried again with another camera with the same result…
And again…
Meanwhile another tinkerer had successfully tried something similar, using an old Konica rangefinder (https://frankencamera.wordpress.com/). Unfortunately, his kickstarter follow-up project to convert a Leica M3 went not so well, at least not for those who invested money in him.
This guy here (https://digitalfilmcams.wordpress.com/) managed to pack a Nex 3 camera onto a Nikon SLR. It is fun to read how he ran into similar problems like myself.
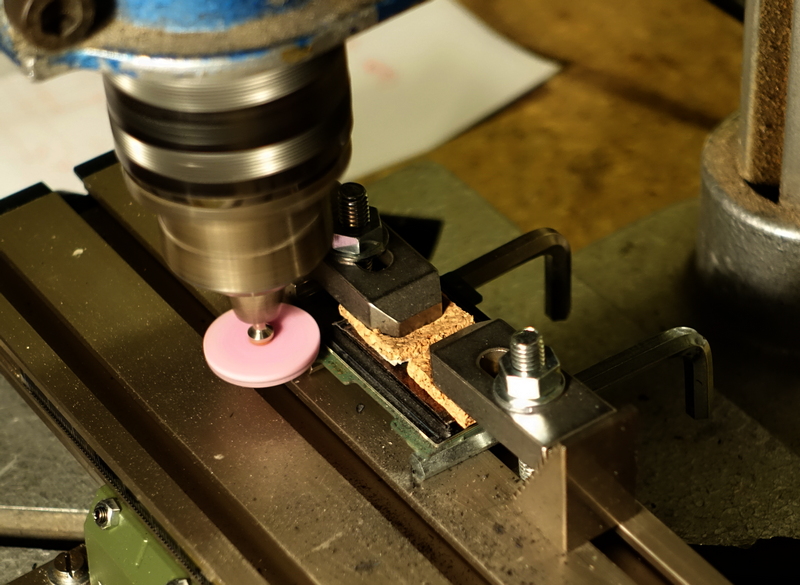
Well, I stopped short of wrecking yet another Sony camera body and turned to a Samsung NX 1000 instead, similarly cheap and with impressive 20 Megapixels, which turned out to be easier to work on and which also suits the Rollei well, given Samsung owned them once. The Samsung sensor has the same (APS-C) size and its frame also needed machining, the material however is much softer and therefore fits my abilities better. Note that I did the grinding with a machine, for the first time…
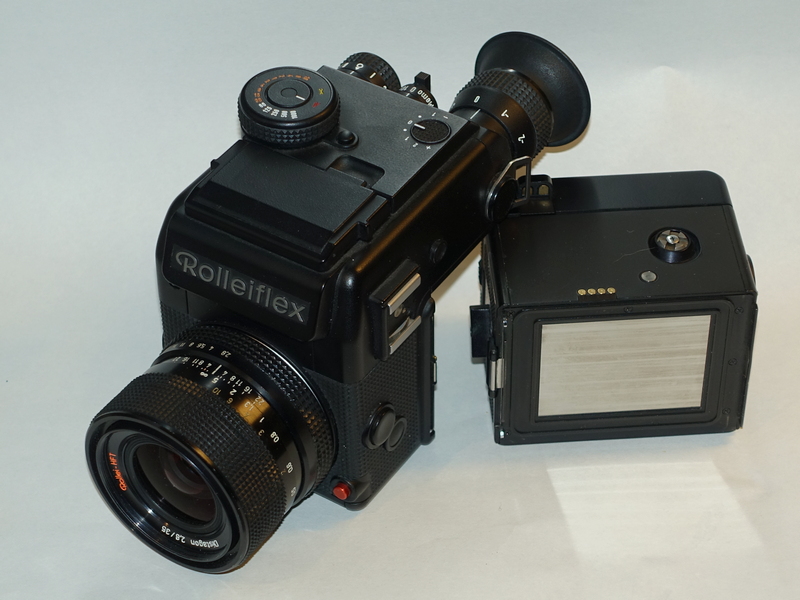
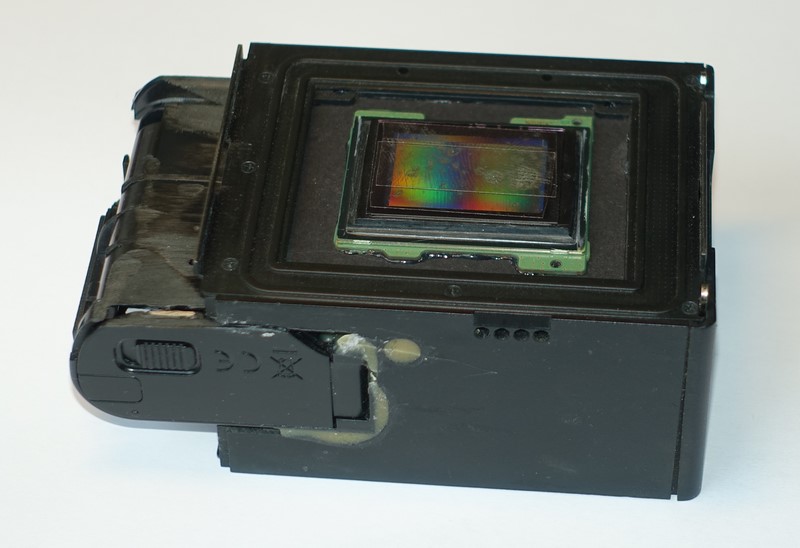
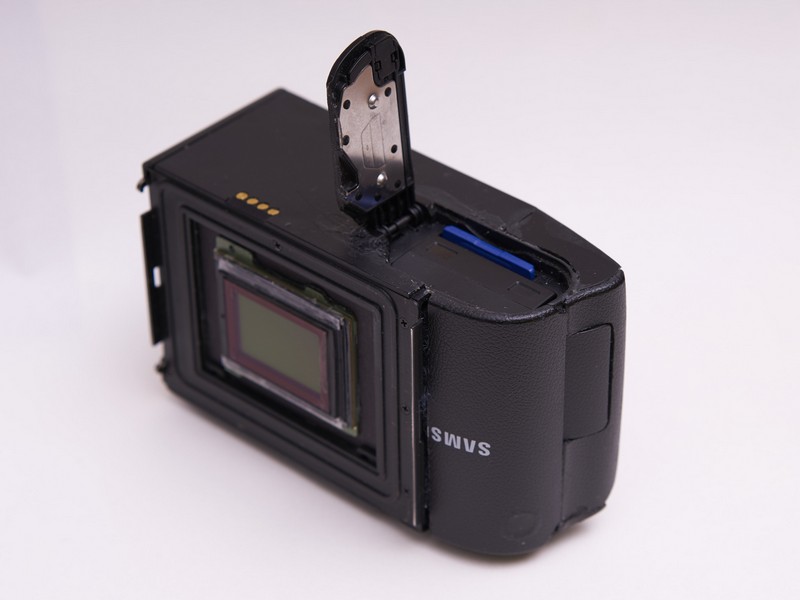
Below
pictures show the sensor already mounted in the housing. Its mounting
plate
(supposed to press the sensor against the film rails) is made of
ordinary
cardboard, a compromise between stiffness and elasticity. Later, the
actual
position of the sensor had to be corrected quite a bit (using stripes
of film
and tape) – it seems the absence of the AA filter caused a
significant change
of the focal plane, compared to what my measurements were in the
beginning (or
I simply miscalculated…).
The initial idea was to position the Sony display under the camera (the NEX display is tiltable). Since the Samsung display is not and the flexboard is short (and since the camera does not work if no display is connected), I had to fit the display inside the housing as well. This looks a little bit weird but at least allows to change settings when the Rollei battery back is removed.
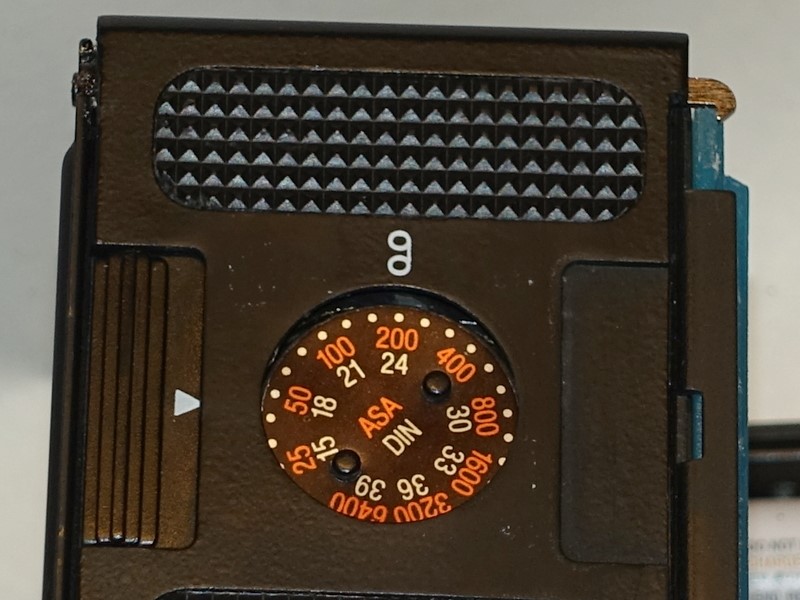
Yet
one
more dial had to be fitted into the housing – ISO, needed by
the camera to
calculate the correct shutter speed. The original magazine bears a
stepped
resistor and a dial on the left side, which I removed and replaced by a
variable resistor, at first.
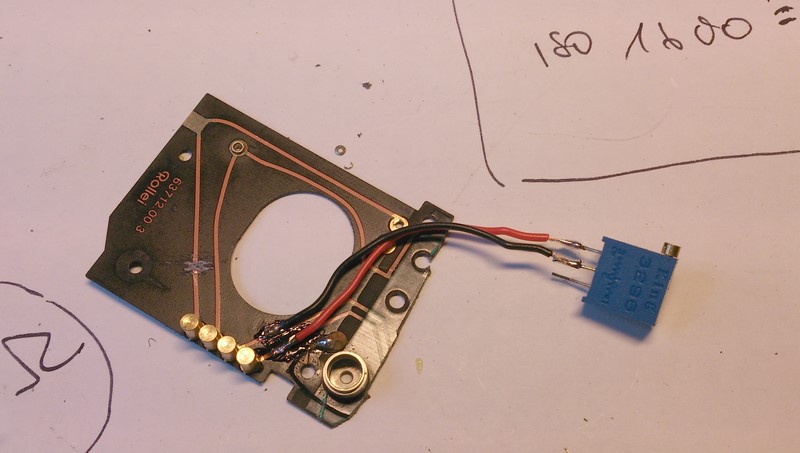
Eventually,
I went all the way and transplanted the original parts to the other
side of the
housing, replacing the knob that once moved the film holder. The roll
film
symbol now serves as the ISO index.
Functionally,
this was the plan:
- Switch
on Rolleiflex and digital back
- Focus
and select aperture on the Rolleiflex
- Release
the shutter on the back („B“ or e.g. 2
seconds)
- Compose
the frame and fire the Rollei shutter.
All Rolleiflex shutter speeds can be used, as long as these are longer than the speeds set on the digital back. During the Samsung's exposure, photons are collected by the sensor - it just happens that those only come through when the Rolleiflex shutter is open. Just which part regulates the light quantity - the Rollei shutter or the idle Samsung shutter in the magazine housing - does not seem to bother the Samsung image processing at all.
If
exposure
correction is needed, this can be done on the Rollei or (faster) using
the
exposure lock. If the ISO setting is changed on the digital back, the
corresponding value must be set on the magazine housing.
Here
are
APS-C sized markings I have put on the focusing screen (not quite
perfect, I
admit).
So
no big
deal, in theory. In practical terms, there were a lot of components
that waited
to be fitted into that small housing.
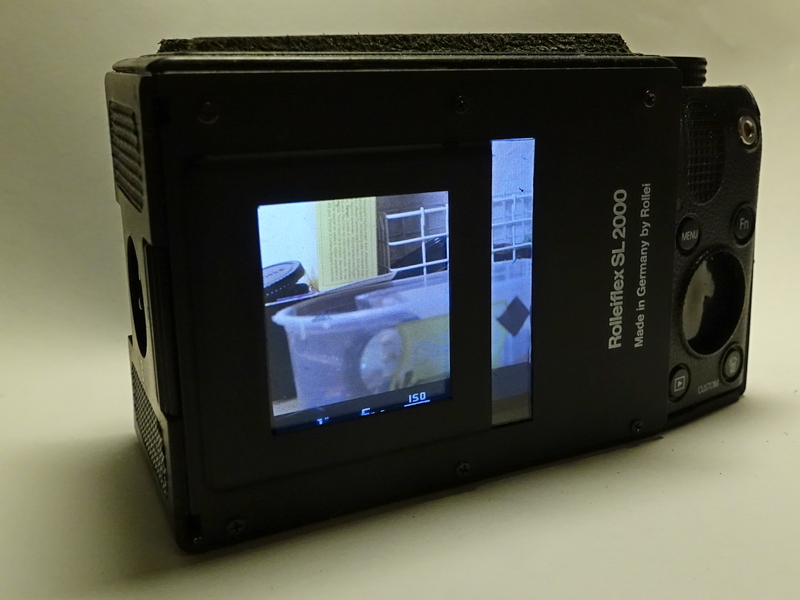
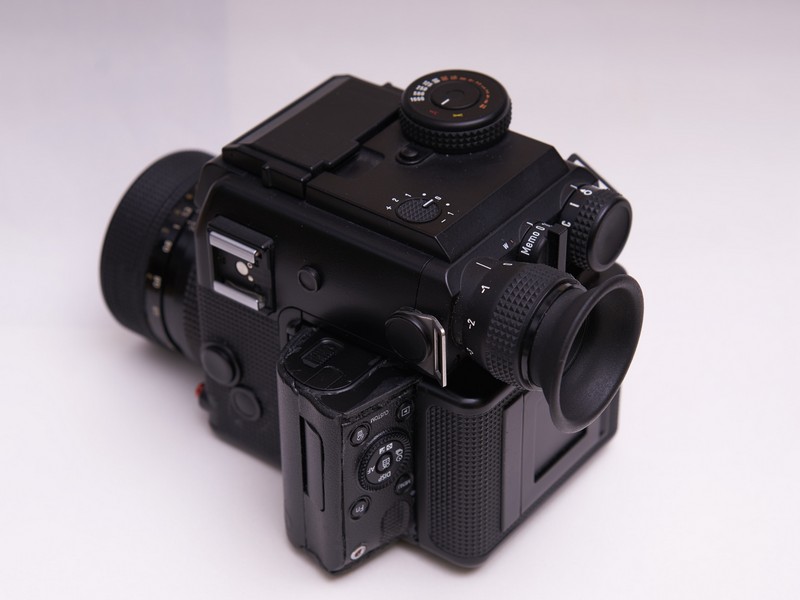
And
then,
very exciting, the first test image. This could well be the first
digital
picture taken with this camera type, this side of the 1987 Sony Mavica
back.
More
body
panels waiting to be fitted:
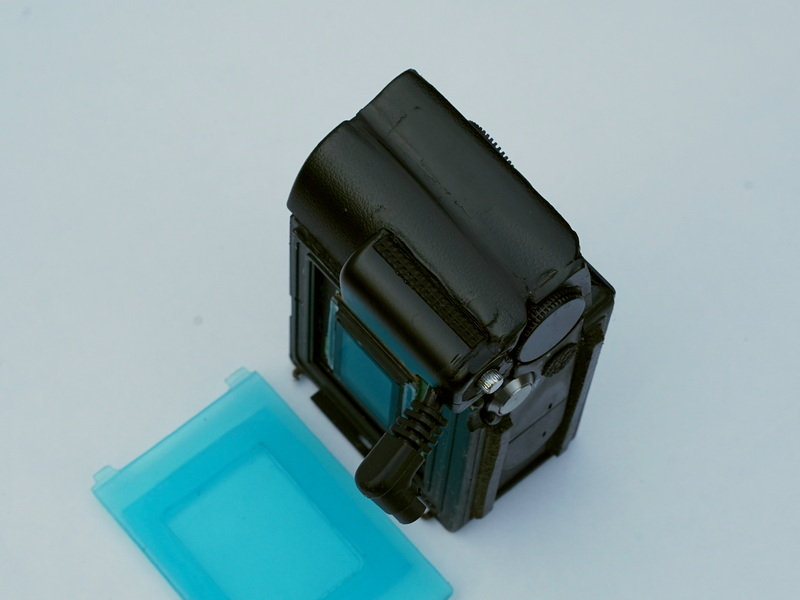
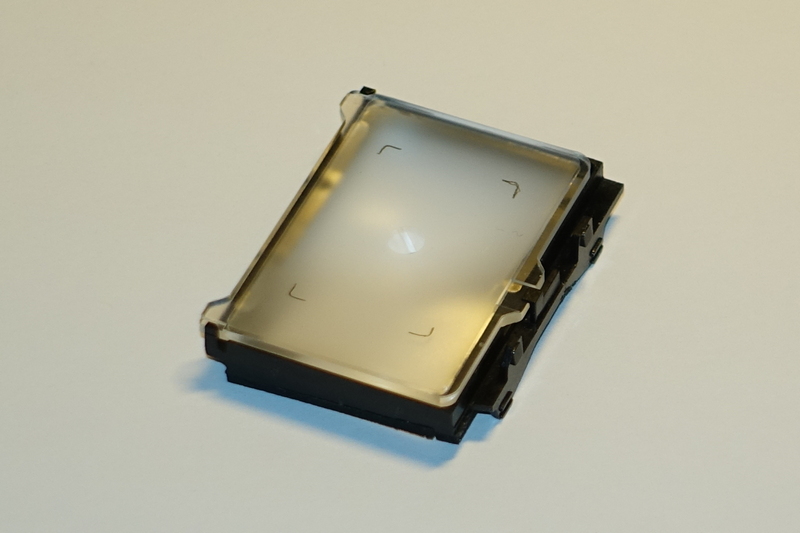
I
have made
a cover to protect the sensor when not in use:
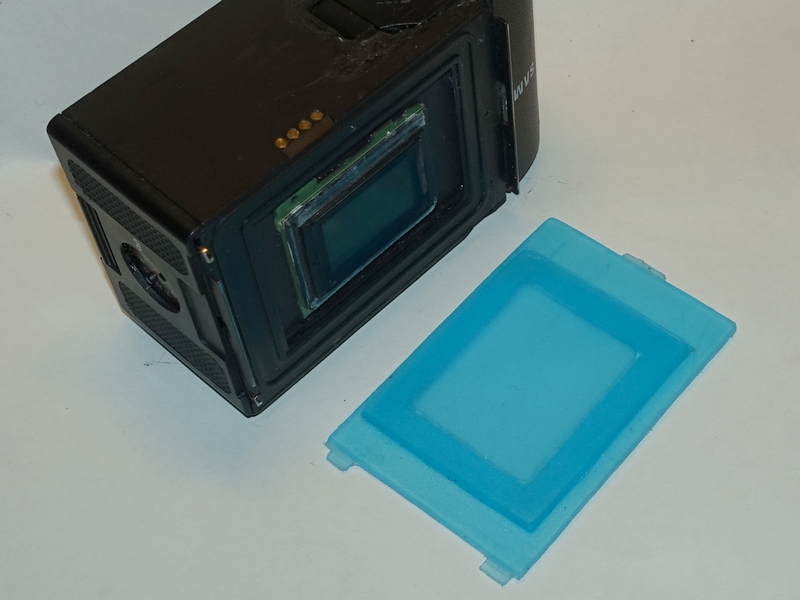
The
blue „Anti
Alias“ filter sitting in front of the sensor had to be
removed, obviously, it
would have collided with the Rollei shutter. With that, the dust
removal
function of the Samsung went as well (a tiny ultrasonic actuator makes
the
glass vibrate).
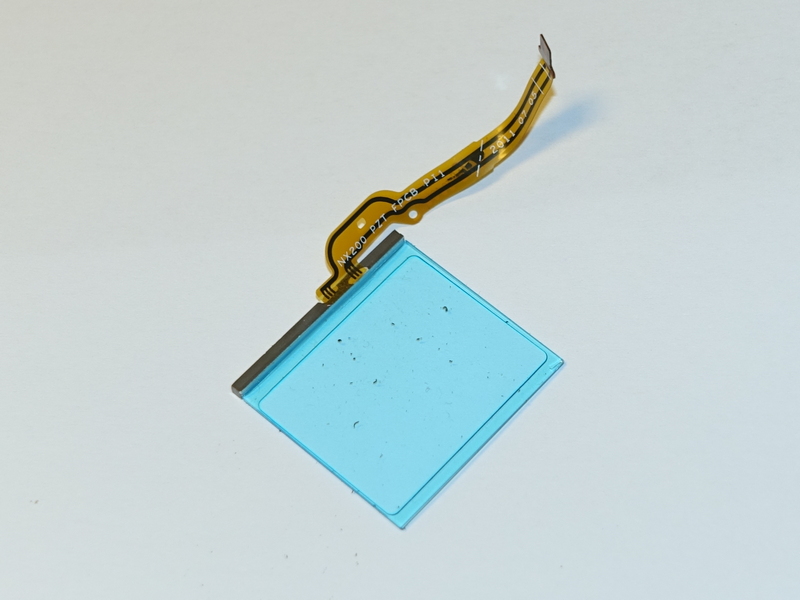
Since
the
sensor is pretty exposed now, any dust can be wiped off easily
(don’t worry,
there still is some glass in front of the photo sites). And dust indeed
has to be wiped off often... WIth the filter gone, dust particles now
gather much closer to the focal plane and the photo sites, and
are
visible tack sharp on the pictures.
If
photographing in RAW format, the color shift caused by the missing blue
glass
can be entirely corrected. While the Samsung also allows for correction
of jpeg colors
in camera, its range is not sufficient to balance the missing filter.
However,
the blue glass is not only an AA filter but also one that cuts out
infrared
light.
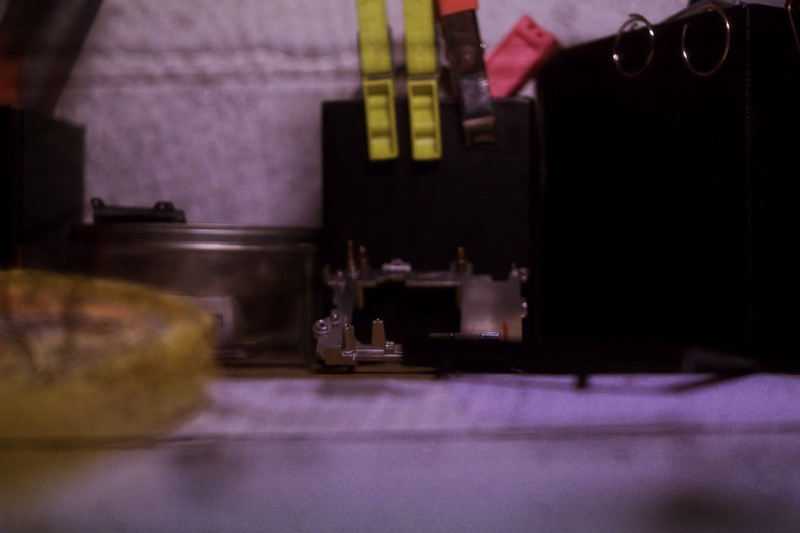
This
test
image already gives a clue of the things that can happen. Where the
white
balance is acceptable on the whole, the purple cast on the left comes
from
incandescent light in the adjoining room.
Outdoors,
things become very strange…
Light
reflected from green plants contains a large share of infrared
frequencies,
invisible to us mere humans but not so for the digital sensor. If the
infrared
cut filter is missing (as in this case), the color reproduction gets
completely
off-balance, like here:
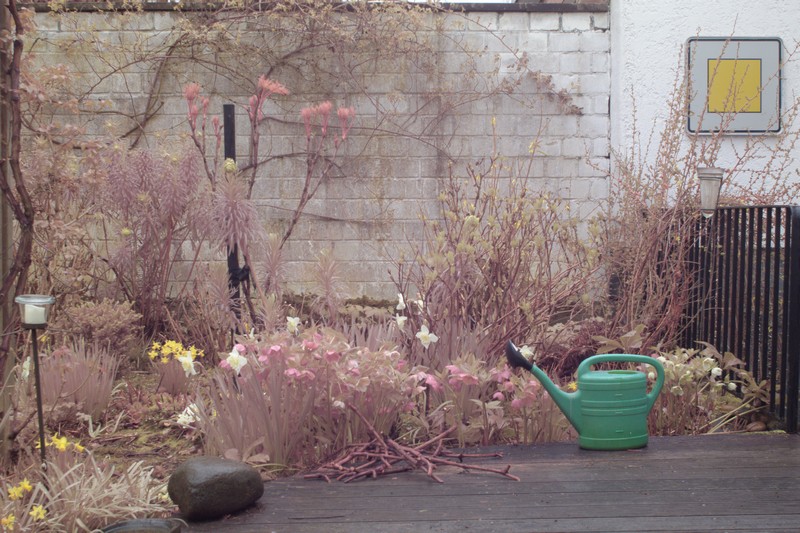
Luckily, there are separate infrared cut filters available (B&W 486) – though not for free - which cure the problem and make the green appear again.
In
principle, there should also be occasional moirée on fine
structures – we will
see.
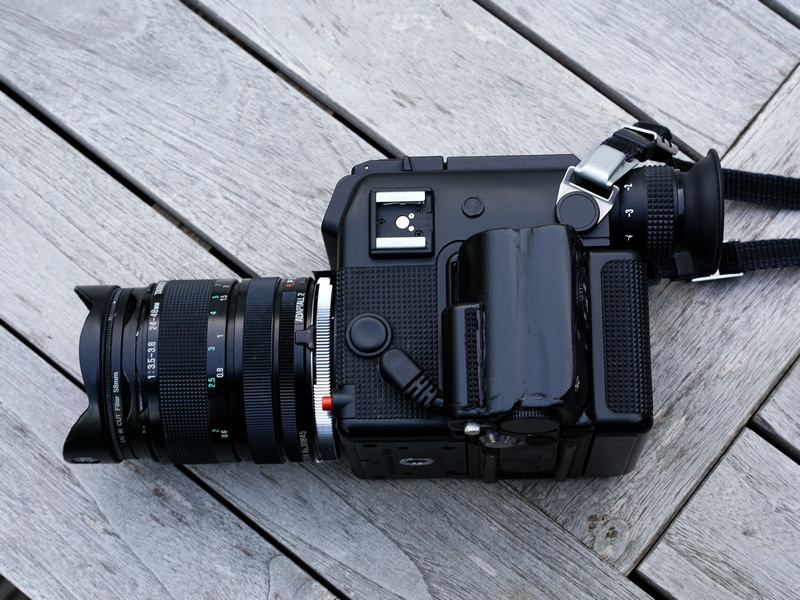
This
is the
completed back:
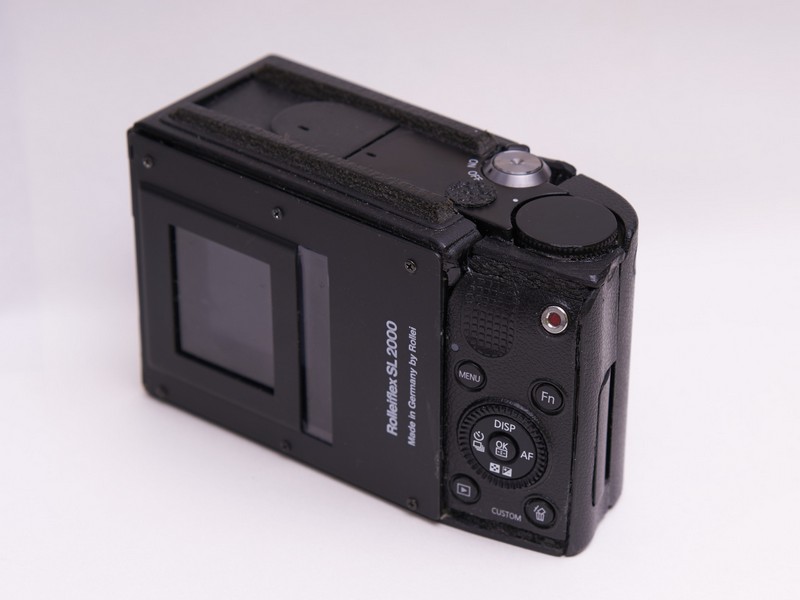
Weight
is
275 grams, 50 grams less than the film magazine, even if it includes an
obsolete focal plane shutter, a battery and a display. Looking at it,
the film
magazine would not have to be that
heavy, it is - in small scale - a symbol of the demise of Rollei.

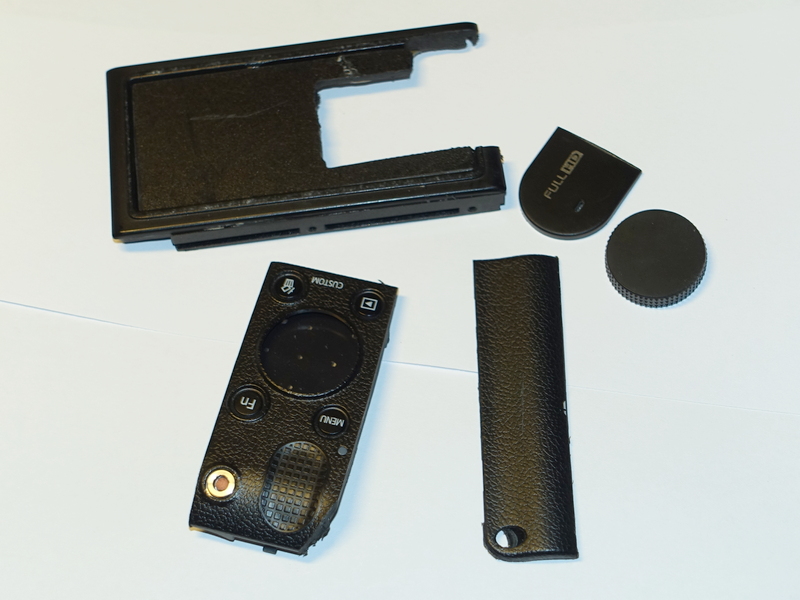
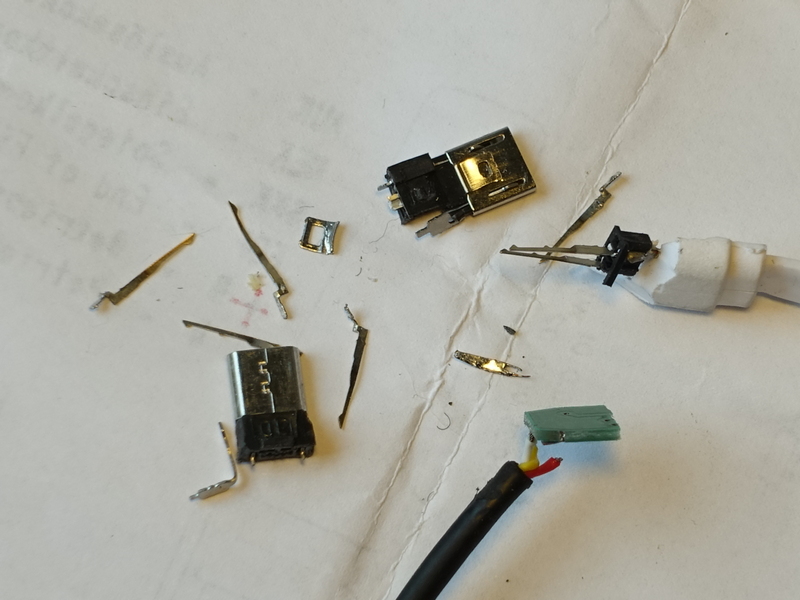
The
magazine includes such a stunning number of individual parts, and it is
so
obvious that cost was no issue for the design, no wonder if was so
expensive,
it cost more than a complete body or two from other makes (and the
image only
shows the parts I have not used
further!).
To
compete
with Samsung or Sony, Rollei would have had to learn more than
autofocus and
sensor technology…
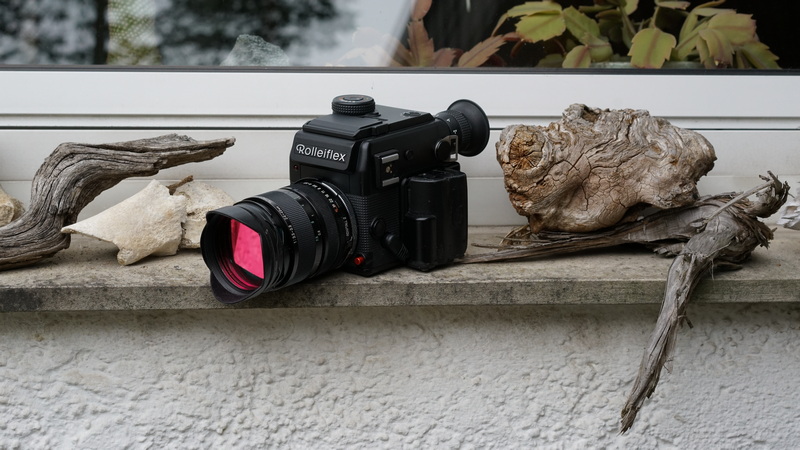
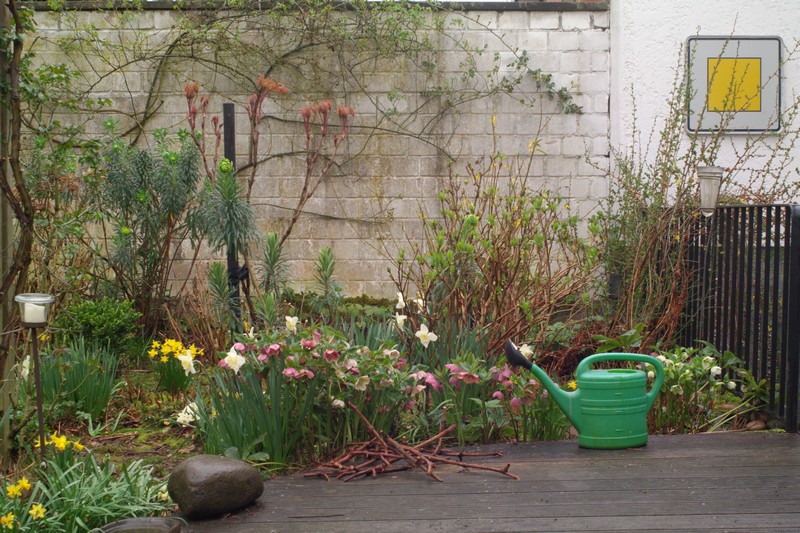
As
a happy ending, here are some Sunday-morning-in-Cologne pictures:


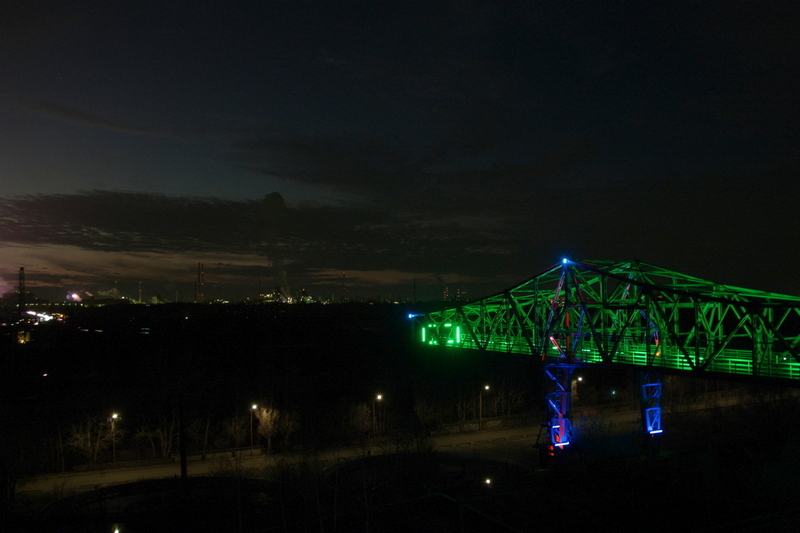
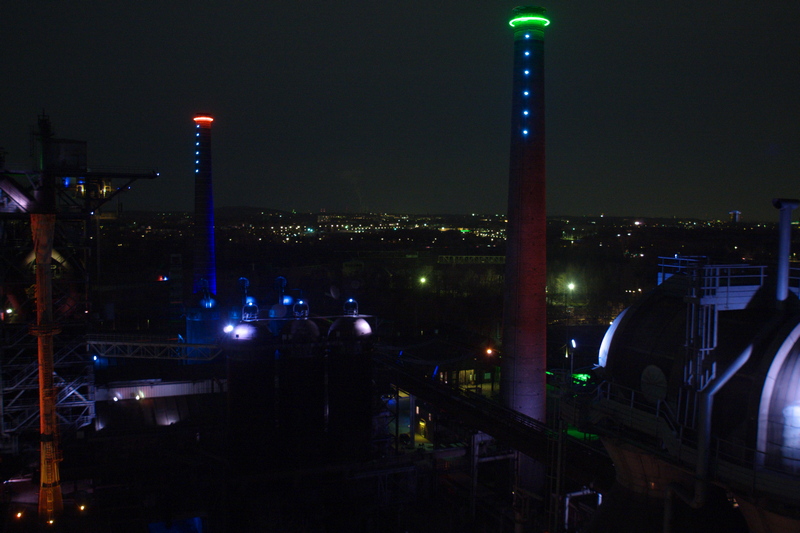
Here are some pictures taken during a nightime visit to the "Landschaftspark Duisburg Nord", a major industrial heritage site.

One
open
questions remains: What does „SWVS“ stand for?
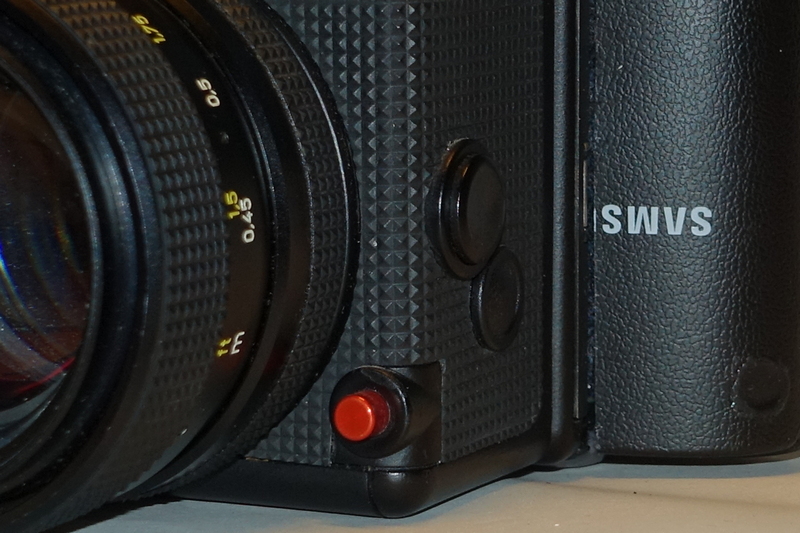
"System With Variable Sensors“?
Update – common shutter release for Rolleiflex
and Samsung back
Fabricating
a common shutter release for the Rolleiflex camera and the Samsung back
proved
to be more complicated than I had thought. Both components can be
triggered
electronically, the Rolleiflex via its remote control socket on the
left side,
the Samsung through its USB port.
USB
remote
controls for the Samsung can be had for a few Euros, the plug however
sticks
out quite a bit, which is both ugly and impractical. While trying to
shorten
the plug, so that the wires would run inside
the housing, I found that the plug contains a small printed circuit
with SMD
components (the remote control handle contains nothing but a switch).
I needed several attempts until I finally managed to solder wires to the plug itself, to lead to the small print board. Not something I would want to do all day…
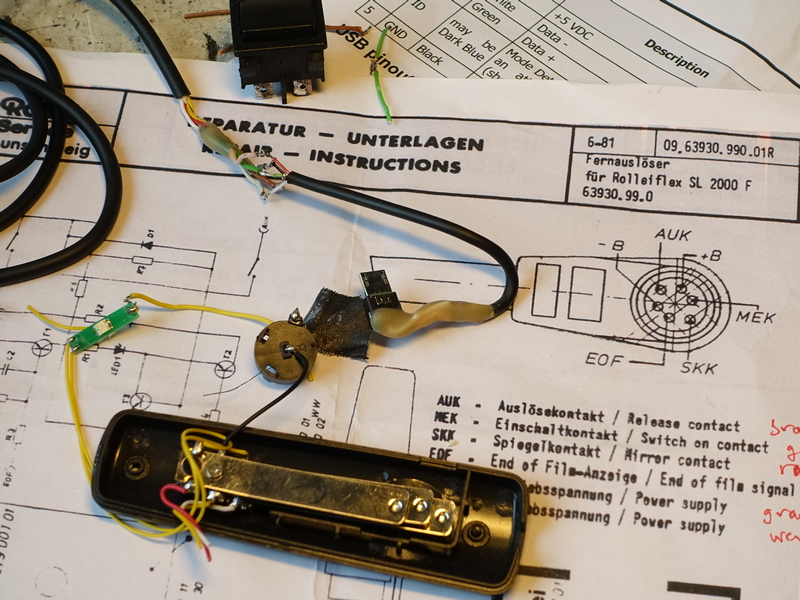
Triggering
the Rolleiflex shutter was easier. Once I understood which contact
switches
the meter and which the shutter, the camera happily rattled on when the cables were
connected. It still needs a two stage shutter release switch though.
Meter and
shutter can be
triggered at the same time, this however means that the camera
fires immediately if one of its own shutter buttons is pressed only
half
way…
And well, the shutter switch would also have to be bipolar because both 'cameras' work off their own energy supply (and with different voltage).
A
two stage
bipolar switch however does not exist, at least not a sufficiently
small one…
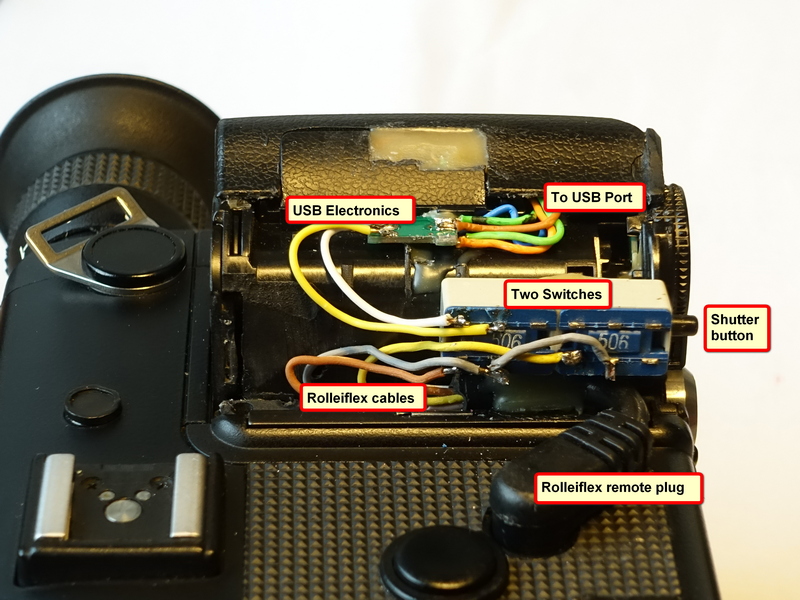
After
some
failures, I managed to fabricate something from two separate bipolar
switches
mounted in sequence. The
first one (pushed from below) puts
on the Rolleiflex meter, and - when pressed further –
actuates the second
switch, which fires both shutters. Luckily, the Samsung shutter delay
is less
than that of the Rolleiflex (inside which a mirror box takes its time
to
operate), so that both shutters can be released at the same time. When
the
Roleiflex has finished raising the mirror and opening the shutter, the
Samsung
sensor already waits for photons.
The
rest
was no big deal. The cryptic SWVS lettering had to go, but at least the
whole
thing is not much bigger now than it was – and a lot easier
to operate.